どうも、リーフです!
今回はCentOS6.7に、PHP4.4.8をインストールする方法を紹介していきたいと思います。
ついでに、Apache、phpMyAdminもインストールします。
前回の記事はこちら↓
今回設定する内容
【1】Apacheのインストール
【2】PHPのインストール
【3】phpMyAdminのインストール
Apacheのインストール
まずは、Apacheからインストールしていきます。
1 | [root@test ~]# yum -y install httpd httpd-devel |
インストールが完了したら、Apacheを起動します。
1 | [root@test ~]# service httpd start |
ついでに、自動起動の設定もしておきましょう。
1 | [root@test ~]# chkconfig httpd on |
1 2 | [root@test ~]# chkconfig --list httpd httpd 0:off 1:off 2:on 3:on 4:on 5:on 6:off |
ここまででApacheのインストール作業は完了です。
Apacheのインストールが正常に完了している場合、
ブラウザにIPアドレスを入力するとテストページが確認できますが、
確認する前に、iptablesの設定を確認しましょう。
ここで拒否する設定になっている場合は、Apacheのページが表示されません。
※iptablesとは、Linuxのファイアウォールのことです。
iptables許可ポートの確認
1 2 3 4 5 6 7 8 9 10 11 12 13 14 15 | [root@test ~]# iptables -L -n --line-number Chain INPUT (policy ACCEPT) num target prot opt source destination 1 ACCEPT all -- 0.0.0.0/0 0.0.0.0/0 state RELATED,ESTABLISHED 2 ACCEPT icmp -- 0.0.0.0/0 0.0.0.0/0 3 ACCEPT all -- 0.0.0.0/0 0.0.0.0/0 4 ACCEPT tcp -- 0.0.0.0/0 0.0.0.0/0 state NEW tcp dpt:22 5 REJECT all -- 0.0.0.0/0 0.0.0.0/0 reject-with icmp-host-prohibited Chain FORWARD (policy ACCEPT) num target prot opt source destination 1 REJECT all -- 0.0.0.0/0 0.0.0.0/0 reject-with icmp-host-prohibited Chain OUTPUT (policy ACCEPT) num target prot opt source destination |
今回の設定では、SSH接続に使用するポート「22番」しか許可されていない状態なので
Apacheで使用するポート「80番」を許可する設定を追加します。
ついでに、SSLで使用されているポート「443番」も追加しておきましょう。
iptables許可ポートの追加
1 2 3 4 | [root@test ~]# iptables -I INPUT 5 -m state --state NEW -p tcp --dport 80 -j ACCEPT [root@test ~]# iptables -I INPUT 6 -m state --state NEW -p tcp --dport 443 -j ACCEPT [root@test ~]# service iptables save [root@test ~]# service iptables restart |
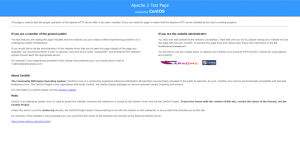
これで、ブラウザでApacheのテストページが確認できるようになりました。
確認してみましょう。
下記のようなページが表示されたら、正常にインストールが完了しています。

次に、PHPのインストール作業に移りますが、その前にApacheでPHPを使用する為の準備をします。
Apacheの設定ファイルを開く
1 | [root@test ~]# vi /etc/httpd/conf/httpd.conf |
1 2 3 4 5 6 7 | # # This is the main Apache server configuration file. It contains the # configuration directives that give the server its instructions. # See <URL:http://httpd.apache.org/docs/2.2/> for detailed information. # In particular, see # <URL:http://httpd.apache.org/docs/2.2/mod/directives.html> # for a discussion of each configuration directive. |
Apacheの設定ファイルを修正
下記コマンドを実行して、修正箇所を検索します。
1 | [root@test ~]# /DirectoryIndex |
1 2 3 4 5 6 7 8 9 10 11 | # # DirectoryIndex: sets the file that Apache will serve if a directory # is requested. # # The index.html.var file (a type-map) is used to deliver content- # negotiated documents. The MultiViews Option can be used for the # same purpose, but it is much slower. # DirectoryIndex index.html index.html.var ↓変更 DirectoryIndex index.html index.html.var index.php |
下記を追加します。
1 2 3 4 | # # PHP # AddType application/x-httpd-php .php |
修正が完了したら、PHPのインストールに移ります。
PHPのインストール
PHPをインストールする前に必要な準備をしていきます。
今回もインストールするバージョンが古い為、ソースからインストールします。
インストールの前準備
必要な関連ライブラリをインストール
1 | [root@test ~]# yum -y install flex gcc |
PHPのソースをダウンロード、圧縮ファイルを展開します。
1 2 3 | [root@test ~]# cd /tmp [root@test tmp]# wget http://museum.php.net/php4/php-4.4.8.tar.gz [root@test tmp]# tar zxvf php-4.4.8.tar.gz |
インストール作業
ソースをコンパイルしてインストールしていきます。
1 2 3 4 | [root@test tmp]# cd php-4.4.8 [root@test php-4.4.8]# ./configure --with-apxs2=/usr/sbin/apxs --enable-mbstring --enable-zend-multibyte [root@test php-4.4.8]# make [root@test php-4.4.8]# make install |
インストールが完了したか、確認してみましょう。
1 2 3 4 | [root@test php-4.4.8]# php -v PHP 4.4.8 (cli) (built: Apr 12 2017 22:53:17) Copyright (c) 1997-2008 The PHP Group Zend Engine v1.3.0, Copyright (c) 1998-2004 Zend Technologies |
バージョンが正常に表示されていれば、大丈夫です。
PHPの設定ファイルを作成
PHPの設定を記述したファイルを作成していきます。
ソースに含まれているテンプレートを元に作成していきます。
1 2 | [root@test php-4.4.8]# cp php.ini-recommended /usr/local/lib/php.ini [root@test php-4.4.8]# vi /usr/local/lib/php.ini |
PHPの設定ファイルを修正
下記コマンドで検索して修正していきます。
一発で検索に一致しない場合は、「n」キーを入力することで次の単語に飛ぶ事ができます。
1 2 3 4 | /register_globals register_globals = Off ↓変更 register_globals = On |
今回は、「euc-jp」に設定しましたが、
ここはそれぞれの環境に合わせた文字コードを指定してください。
1 2 3 4 | /default_charset ;default_charset = "iso-8859-1" ↓変更 default_charset = "euc-jp" |
1 2 3 4 | /mbstring.language ;mbstring.language = Japanese ↓変更 mbstring.language = Japanese |
1 2 3 4 | /mbstring.internal_encoding ;mbstring.internal_encoding = EUC-JP ↓変更 mbstring.internal_encoding = EUC-JP |
ここまでの修正が完了したら、Apacheを再起動して設定を反映させます。
1 | [root@test php-4.4.8]# service httpd restart |
PHPの情報確認
PHPの情報を確認する為の、テストページを作成します。
1 2 | [root@test php-4.4.8]# cd /var/www/html vi phpinfo.php |
下記の内容を記入したファイルを作成します。
1 2 3 | <?php phpinfo(); ?> |
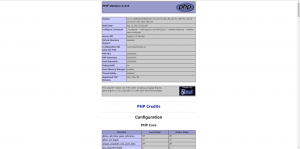
完成したら、「IPアドレス/phpinfo.php」でアクセスしてみます。
下記のようなページが表示されたら、設定完了です。

phpMyAdminのインストール
phpMyAdminをソースからインストールしていきます。
まずは、ダウンロードして、圧縮ファイルを展開します。
インストール作業
1 2 3 | [root@test html]# cd /tmp [root@test tmp]# wget https://files.phpmyadmin.net/phpMyAdmin/2.11.11.3/phpMyAdmin-2.11.11.3-all-languages.tar.gz [root@test tmp]# tar xzfv phpMyAdmin-2.11.11.3-all-languages.tar.gz |
展開したファイルを設置したい場所へ移動
1 | [root@test tmp]# mv phpMyAdmin-2.11.11.3-all-languages /var/www/html/phpMyAdmin |
phpMyAdmin設定ファイルの作成
1 2 3 4 | [root@test tmp]# cd /var/www/html/phpMyAdmin [root@test phpMyAdmin]# cp config.sample.inc.php config.inc.php [root@test phpMyAdmin]# chmod 660 config.inc.php [root@test phpMyAdmin]# chown -R root.apache /var/www/html/phpMyAdmin |
phpMyAdmin設定ファイルの編集
1 | [root@test phpMyAdmin]# vi config.inc.php |
1 2 3 4 5 6 7 | $cfg['blowfish_secret'] = ''; ↓変更 $cfg['blowfish_secret'] = 'hogehoge'; ↓以下を追加 $cfg['DefaultLang'] = 'ja-euc'; $cfg['DefaultCharset'] - 'ja-euc'; |
設定が完了したら、一応サービスを再起動します。
1 2 | [root@test phpMyAdmin]# service httpd restart [root@test phpMyAdmin]# service mysqld restart |
phpMyAdminの確認
上記作業がすべて完了したら、インストールが正常に完了したか確認します。
「IPアドレス/phpMyAdmin」にアクセスしてみます。
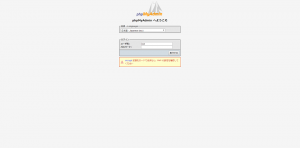

このような画面が表示されたら、設定は完了していると思います。
試しにログインできるか確認もしましょう。
まとめ
今回は、CentOS6.7にApache、PHP4.4.8、phpMyAdminをインストールする方法を紹介しました。
この他にもインストールする方法やオプションの設定など色々ありますが、
今回はこの設定にしました。
またインストールしただけで、セキュリティの設定などはなにもしていませんので
試してみる場合はご注意を!
それでは、今日はこの辺で失礼します。


